

By continuing with this install you
agree that you have read and agree to the disclaimer.
Please take the time to read it.
Needed Tools:
-
Philips Screwdriver
-
Soldering Iron (15W or less)
-
Solder (Low Melting Point)
Disassembling your PSX:
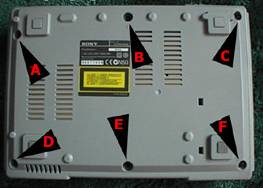
Step 1: Remove the PlayStation cover:
|
 |
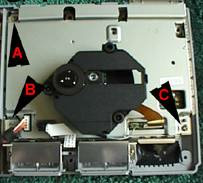
| Step 2: Remove the laser unit:
Gently remove the wires coming from the laser unit. Make sure to hold the ribbon cable right where it goes into the connector. The ribbon comes out of the connector, the connector is NOT part of the ribbon cable, so do not pull on the connector as you can break it off the board. Just lift up the laser unit and put it aside. Remove the ribbon cable coming from the gamepad connectors, again do not pull on the connector, the ribbon comes out of the connector, Remove the cable coming from the power supply, it just lifts up and out of the connector on the board. |
|
Step 3: Removing the metal bracket:
|
|
Step 4: Removing the circuit board:
|
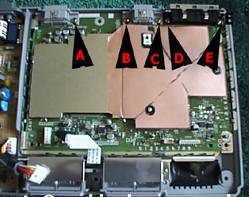 |
You
are now ready to install the chip!
Click here to continue
![]()
![]()
![]()
![]()
![]()
![]()
![]()
